Share
Pin
Tweet
Send
Share
Send

Dismantling the ceiling in the Opel Vectra B (station wagon)
One warm sunny day, I started to remove the ceiling. Since the station wagon body is large enough, there are many mounting places.
To start, I opened all the doors and started work from the back of the car. The first to surrender was a plastic panel that covers the edge of the ceiling at the tailgate.


The side “slopes” of the windows are also fastened to the latches. Above the windows of the luggage compartment there are two plastic plugs that are removed after pulling the studs.

The backlight is held on a plastic "mustache".

Next, you can detach the vertical panels in which the front seat belts are located. I did not remove them completely, but only pulled the upper part inside the cabin.

There are handles above the rear doors and above the front passenger. First, you need to open the decorative caps with a thin flat screwdriver, after which the screws are removed with a Phillips screwdriver. In the rear handles, it is necessary to disconnect the electrical connector from the backlight.

In the front of the cabin, the central ceiling is dismantled, the casing of which is supported by steel latches.

Two screws are hidden under the ceiling. The body of the ceiling, in addition to two screws in the front, is held by two metal latches.

Sun visors are fastened with three screws, and an electric wire is also attached to them.


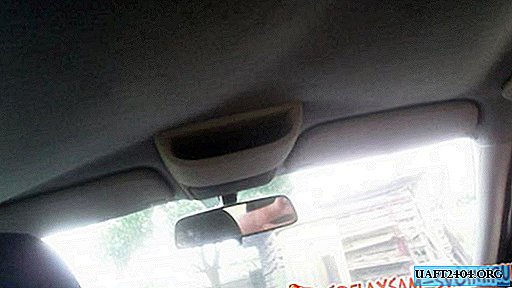
Near the windshield, latched plastic panels are attached to the latches. Under the left panel is a bus, through which there is current to the interior lighting. I had it damaged, I had to give it to a familiar electrician for repair. The last fixing element of the ceiling was a plastic "piston" in the central part of the ceiling.
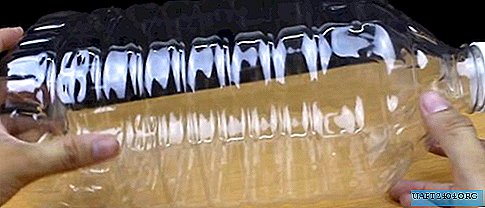
The ceiling panel, freed from fixtures, can be easily pulled out through the tailgate.
Stripping old fabric
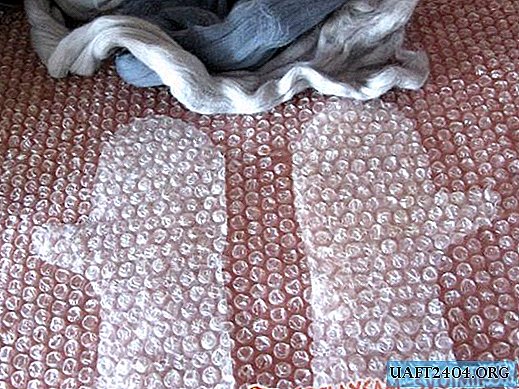
The old fabric that has fulfilled its mission can be quickly torn and discarded, and the remnants can be removed with a metal brush. In my case, the material was new, so I decided to carefully remove it. To do this, you need an ordinary small knife with a blunt "nose". A lot of patience was required to peel off the edges and edges, but the central part rested on an “honest word”.

I tried to remove the material along with the foam layer.

For myself, I concluded that in the repair process, the "master" violated the technology, which led to the peeling of the fabric.
There were traces of glue and foam on the ceiling panel, which I removed with the same knife, as well as clean rags and solvent 646. The foam layer was also carefully treated with a solvent. The choice of glue and the fineness of gluing
Today, the market has a wide range of fabric adhesives. For the restoration of the car ceiling, heat-resistant glue is required, because in the summer heat the roof is very hot, and the glue can turn from solid to liquid. The fabric will sag immediately.
After reading the reviews on the online forums, I decided to try ABRO aerosol glue.

Of course, it’s easy to work with it, just turn the sprayer to the working position to evenly apply glue to the surface. After drying, there are no odors in the cabin. But, despite the observance of all paragraphs of the instructions and daily exposure, the first sunny day plunged me into gloom. The fabric peeled off, but as soon as I ran my hand over it, she again grappled with the base. This happened every time the sun heated the roof.
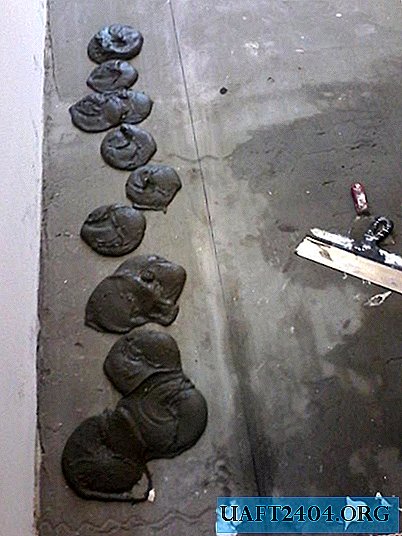
After a couple of months, I could not stand it and again dismantled the skin. This time I bought a liter can of Russian glue 88 luxe (universal).

I had to apply glue with a brush, this activity is not for weak hands. The composition is very viscous, well absorbed into the base. I applied two layers, while the room was well ventilated (draft). It should be noted that my fear of impregnating the fabric with a dark composition did not materialize. Nowhere did the glue come out and ruin the skin. So that the material is guaranteed to stick to the base and dry, I spread the plastic film on the glued fabric and poured sand. The result is a kind of oppression. After two days, the ceiling was ready for installation in the cabin.

I advise you to install in the reverse order, starting with the visors and the front lamp. The smell of glue was felt for about a week, although it ventilated the car almost daily. But the fabric holds securely, which pleases both the eyes and the soul. After all, I did this work myself!

Share
Pin
Tweet
Send
Share
Send