Share
Pin
Tweet
Send
Share
Send
For the manufacture we need the following materials:
1. Wooden blank box.
2. The primer.
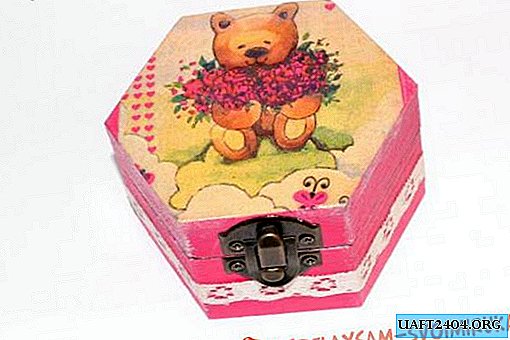
3. Decoupage napkin. A napkin with a teddy bear was chosen for this master class.
4. PVA glue, scissors, pencil, sponge, brushes, screwdriver.
5. Acrylic paints.
6. Lace.
7. 3D Potch.
8. Acrylic varnish.
Now you can start decorating.
First step. That the box was conveniently decorated, it must be disassembled. Therefore, we arm ourselves with a screwdriver and unscrew all the metal fasteners so that the box splits into two parts, and nothing prevents us.
However, before making any design actions on the box, it must be primed. You need to do this so that the paint is better laid on the surface, and the box lasts longer. So, we take a brush and, dipping it into the ground, we smear the entire surface of the workpiece from the outside and inside. Let the primer dry.
Since the background of our napkin is white, it is better to paint the entire lid of the casket with white acrylic paint so that the tree does not shine through and does not spoil the napkin. After the paint dries, we proceed to cutting the napkin.

Second phase. We select a suitable graphic motif, turn the napkin over, put the box cover on it and draw a pencil around the outline. Then we cut it out, put it on the lid and adjust it if necessary.

Now the napkin needs to be peeled off, getting rid of two extra layers, and leave only the upper thin layer with the picture. And you can start applying the napkin to the lid.
So that the napkin lies flat, you can use ordinary tap water. Pour water into a glass, take a brush, apply a napkin to the lid and drip a little water in the center. We begin to gently moisten the entire cloth, moving from the center. If in some place it lies unevenly, raise the napkin by the dry edge and lower it again, smoothing it with a wet brush. So we get to the edges of the napkin and also “glue” them with water. This method helps to avoid air bubbles and wrinkles when applying glue to a tissue.

It is not necessary to wait for the wipes to dry. Because then it just falls off. Therefore, we take PVA glue, dip a brush into it and glue a wet towel with glue. This must be done very carefully so as not to tear the napkin.

But now you can wait for drying.
The third stage. We proceed to painting the side parts of the casket. We breed pink acrylic paint to match the hearts on a napkin and paint over the side of the lid and the entire lower part.

After the paint dries, you can do lace. We measure a strip of lace of suitable length and cut it off. Now let's make the lace more elegant and unusual. To do this, take silver paint and a sponge. Put the lace on a sheet of paper or newspaper, dip a sponge in silver paint and apply it on the lace, gently staining it.
Again, we wait for the paint to dry, turn the lace over and grease the inside with PVA glue. Now you can stick it to the bottom of our casket.

The fourth stage. While the lace dries, we will take care of the inside of the box. It was decided to paint it with silver paint. But in order for the silver paint to fit better and the tree not to shine through, you must first paint the inside with acrylic gray paint. When the paint dries, you can apply a second coat - now silver.


The fifth stage. To give the casket a finished look, we take the sponge again, dip it in silver paint and “flip” the side parts of the casket at the corners.
At this stage, the box can already be reassembled, but it is better to do this at the very end, when the varnish dries.
We take a 3D potch and apply it from a tube to a teddy bear and a cloud. First, we circle the image along the contour, then inside until the images are completely filled with the flood. Outwardly, Patch is a bit like PVA glue, but after drying it becomes transparent and gives the image volume. He dies, by the way, about four hours, depending on the size of the image. You can just leave the box overnight.


Sixth stage. After the caskets have completely dried, we cover it with acrylic varnish inside and out in two layers. The gap between the layers is about half an hour. And the box completely dries 24 hours.
That's all! Now the box will be able to please you and your loved ones! A wonderful positive interior decoration and a good gift.
Share
Pin
Tweet
Send
Share
Send