Share
Pin
Tweet
Send
Share
Send
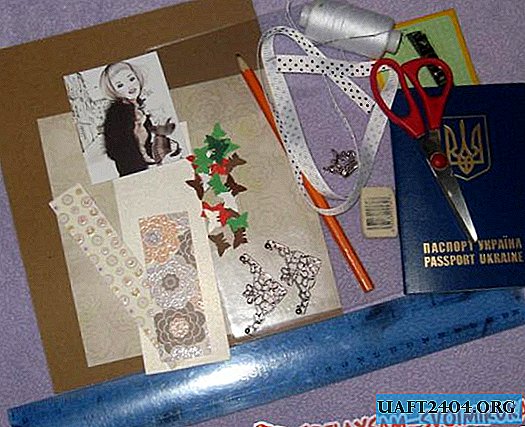
• Transparent cover for passport;
• Brown paper for pastels;
• Scrapbooking paper in light brown tones, a sheet measuring 15 * 15 cm and several small rectangles of arbitrary size;
• A picture for scrapbooking with a girl;
• Cutting down small brown butterflies;
• White rep ribbon with black polka dots;
• Double-sided tape;
• Acrylic stamp “Passport”;
• Two silver metal corners;
• Black ink pad;
• Additional materials: eraser, pencil, ruler, scissors.
Cut off half of the sheet from brown pastel, apply a passport and cut out a rectangle measuring 12.5 * 18 cm.


Divide the rectangle in half, draw an invisible line for bending using scissors.


We get a blank for the passport in folded form measuring 9 * 12.5 cm.


We try on a blank in a transparent cover.


Proceed to the top. On a sheet of scrapbook paper we measure out a rectangle of 8.5 * 12 cm, cut it out. This is for the front cover.


We glue the back part from two rectangles to also get one 8.5 * 12 cm in size. Vertically, we sew on a typewriter a rectangle of paper of a different color, as in the photo below.


And also on the machine we sew another rectangle, but already smaller. We attach a ribbon to the picture of the girl, wrap it and glue it with small pieces of adhesive tape.


We attach the picture to the scrapbook paper and sew the ribbon first. And then the whole picture in a circle, the second blank is also sewn on a typewriter. On a separate sheet of white paper we stamp the inscription “Passport”, cut out a rectangle with the inscription.


Sew on the typewriter. On small pieces of adhesive tape, glue both parts to the base of the cover.


And in a circle we sew both sides.


In the corners at the top and bottom with a glue gun, glue the metal corners and two cuttings of butterflies. We put it in a transparent cover and the new cover for the passport is ready!

Share
Pin
Tweet
Send
Share
Send