With this home-made device, you can perform soldering work quickly and efficiently - all the necessary manipulations are done with one hand. This is very convenient, especially when you have to solder a lot. You can make such a home soldering iron with your own hands.
Manufacturing process
First you need to cut a wooden blank of a suitable shape and drill holes in it approximately in the center from two sides. After that, you will need to cut another blank, but already from a metal strip, using a paper template for this.
We drill four holes in the resulting steel billet, and then bend it in the form of a clamp, which we put on the base of the electric soldering iron handle, insert a wooden billet between the plates and fix it with two screws.
Soldering Iron Assembly
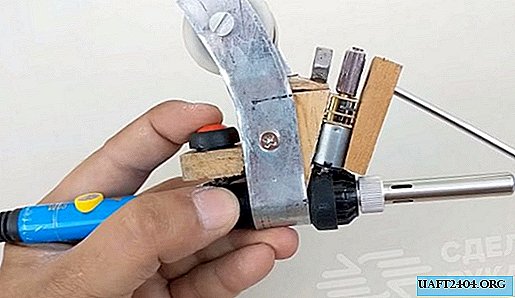
At the next stage of work, we attach the remaining parts to the soldering iron body, including a small electric motor and an automatic solder feed button. As a nozzle, you can use a segment of a hollow stainless tube (for example, from a telescopic antenna from a radio receiver).

After that, we connect the wires of the electric motor with the contacts of the power button and connect the standard network power adapter. Next, we install a coil with solder and the tool is completely ready for work. When you press the button, the solder through the tube is automatically fed to the tip of the electric soldering iron.

It is very convenient to work with such a tool, but the main thing is that it is easy to make it yourself from improvised materials. See the step-by-step process in the video on our website.