Today on the Internet you can order different types of epoxy, but not all of them are suitable for some serious work on the manufacture of decorative homemade products and countertops.

Therefore, before using this or that epoxy, it is advisable to test it on simple homemade products, so that then there are no unexpected surprises. In this review, we test the transparent polymer resin from Artline.
Pour vegetables with epoxy

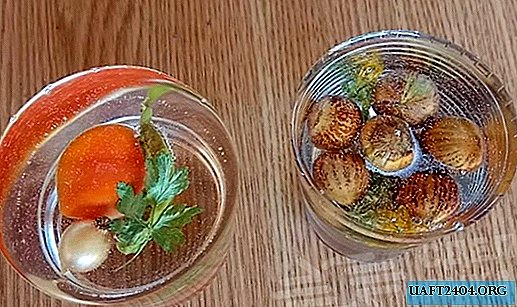
In this experiment, we will use pepper, tomato, and onion as "experimental rabbits." The mold for pouring polymer epoxy is an ordinary plastic glass with a capacity of 500 ml (in principle, you can use other containers that are at hand).

We mix the epoxy with the hardener in the recommended proportions (read the instructions) and pour about half of the desired amount into a plastic container. Then gently dip the vegetables into the glass. From the remnants of epoxy, we fill in a small 100-gram cup hazelnuts - also as an experiment. Then we'll see what happens.

Leave the mold for 4 hours so that the epoxy hardens a little, after which we make a new “kneading” and add the rest of the epoxy with a hardener to a glass. According to the instructions, complete solidification occurs after 24 hours, so you need to wait a day.
Summing up the experiment

After 24 hours from the moment of pouring the second layer, we cut the plastic cup and get the finished product. The epoxy did not boil, which is good, and there are no accumulations of air bubbles inside the workpiece itself. So, we can conclude that the experiment was a success, and this resin can be used for more serious things.