Share
Pin
Tweet
Send
Share
Send
Consider one of the possible methods of manufacturing a manual uprooter based on a drum type automobile brake pad unsuitable for further use for the intended purpose.

This element of the braking mechanism is great for the new function: it is quite tough, has a cylindrical shape and will easily roll on the ground or support, and the remains of the friction lining will not allow the device to slip at the time of root uprooting.
What can we need for this?
Tools and materials
In addition to the already mentioned used brake pad, we must stock up or purchase:
- two strips of ferrous metal measuring approximately 100 × 40 × 5 mm;
- one strip of ferrous metal approximately 120 × 30 × 4 mm;
- a rectangular profile pipe 40 × 20 × 2-3 mm and a length of about 1 m;
- two sets of threaded connection M6 or M8 "bolt-washer-nut";
- vice is metalwork;
- grinder;
- electric welding machine;
- drilling machine or electric drill.
The process of manufacturing a homemade uprooter
Any adult who is a little versed in welding and plumbing can handle this job. You can select the following sequence of actions:
1. We clamp one of their two strips of metal in a vice and grinder along the long side, backing 10 mm from the edge, closer to the end we cut a strip 5 mm wide and about 50 mm long.


2. Then we weld this part with a slot up to the end of the short shoulder of the brake shoe relative to the axis of its attachment to the support disk.


3. We weld perpendicularly to the second strip of metal in the same place where the slot is located on the first, the metal strip is narrower but longer.


From the side of the weld joint on a wide strip with a grinder, we apply a cross notch.

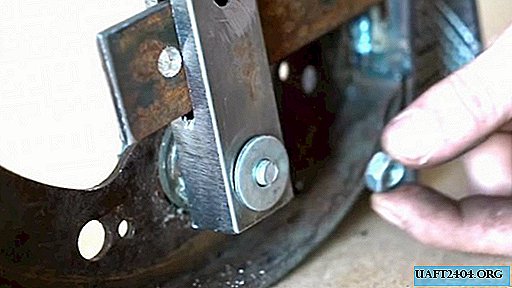
4. We insert the part with the notch of the welded strip into the slot of the element fixed to the block with an integral connection.

5. We try the handle-lever and mark at the lower end the place of the hole for connection with the block through which the swing axis of the lever will pass to actuate the movable grip of the uprooter.
6. Next, drill holes and make a slot for skipping and attaching the movable gripper rod to the lever handle.


7. It remains to fasten the movable parts of the improvised uprooter with bolted joints and our improvised device is completely ready to work for its intended purpose.

To operate such a device is much simpler and more convenient, and without unnecessary expenditures of physical forces and time.


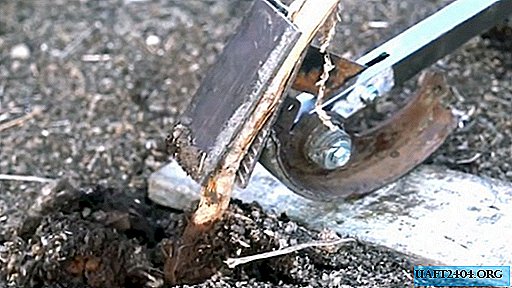
The eradicator is installed on the ground near the trunk. If the soil is soft, a piece of wooden board must be placed under the device.

Having put the lever handle forward, we grab the trunk with a movable clamp and begin to deflect the lever to the side and down. First, the tree trunk is pinched between the movable and fixed clamps. Then the device, rolling the brake shoe on the ground (board), pulls a pinched tree trunk along with it and as a result pulls the root system out of the soil.
Again:


P. S.
For the convenience of holding the device at the time of capture of the tree trunk and the safety of the shoes, you can weld a square or round heel-stop from the other end of the brake shoe.


Share
Pin
Tweet
Send
Share
Send