Share
Pin
Tweet
Send
Share
Send
By Easter, a souvenir in the form of an Easter egg, which can be made of plaster, will be an appropriate gift.
For work, you need materials:
- 1. Plaster of construction.
- 2. The shell of the egg.
- 3. The shape of the candy.
- 4. The screw.
- 5. Acrylic paints in white, green, brown, black and gold.
- 6. Napkin for decoupage with chickens.
- 7. PVA glue.
- 8. Synthetic brush.
- 9. Sequins.
- 10. Varnish.

The process of making souvenirs
1. First, release the shell from the contents. At the same time, we make a small hole on only one side of the egg. We wash the shell and dry it. Then knead the gypsum. In this case, we dilute gypsum in water to a liquid consistency. Then we set the empty shell in the egg tray. This is done for structural stability.

2. Fill the shell with gypsum to the very top.

3. Then we make an egg stand. To do this, cut one square from the candy packaging. In the center we pierce a candy mold and we pass a screw into it.

4. Install the candy mold in the shell so that the screw is completely in plaster. This work needs to be done quickly, until the gypsum in the shell has frozen.

5. Next, fill the plaster in a candy mold. We leave the product in this form until it dries completely (preferably at night).

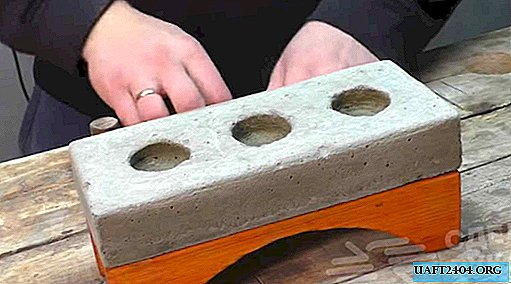
6. Then carefully remove the candy cane, cutting it around the edges. And after - we clear the shell. We get here such a plaster blank:

7. The workpiece must be primed with white acrylic paint.

8. Next, paint the top (egg) in green.

9. The base is painted with brown paint.

10. Then on the stand you need to make gold highlights. To do this, an almost dry brush dipped in gold paint, we pass through the entire stand.

11. Continue the decor of the egg. Decorate the egg using the Decoupage technique. To do this, use a napkin with the motives of "chickens." We cut out two chickens from a napkin and separate the pictures from the lower layers.

12. Apply the motive to the egg and glue it. Let the motive dry and glue the second chicken on the back of the egg.


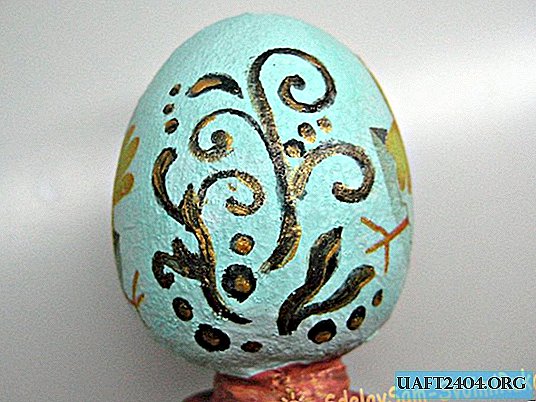
13. Between chickens free space is obtained. Fill it with an arbitrary pattern.

14. Add a little golden color to black.
15. On the top of the egg, glue the spangles and cover the product with varnish.

Ready souvenir in the form of an egg on a stand is ready!


Share
Pin
Tweet
Send
Share
Send