Share
Pin
Tweet
Send
Share
Send
There is only one way out: the installation of a modern gas-discharge system, that is, xenon. Simple replacement of a halogen lamp with a gas flask solves the problem partially:
- Firstly, this is a clear violation of the technical regulations. Installation of discharge lamps in headlights with a reflector (reflector) designed for halogen is prohibited.
- Secondly, the reflector is designed for a point source of light, that is, a spiral. The diffuse cloud of luminous gas in the xenon bulb does not focus, and gives a lot of stray light. For this reason, cars that simply replaced the halogen with xenon mercilessly blind oncoming drivers, even in low beam.
Chinese inventors offer many non-standard gas-discharge flasks made on halogen caps: H1, H4, HB3, etc. Allegedly for a "regular" replacement. This approach is fundamentally wrong.
Installation of the finished headlight (or lighting module) in the form of a lens
Structurally, it can be a full-fledged headlight with a lens and a standard base for one of the standards of xenon flasks. There are ready-made blocks in the body: they can be installed in the body separately from the headlights. But the most common retrofit option (it is also the most economical) is a lensed module without a housing.
For reference: lensed modules can be separately for dipped and high beams (marked respectively DC and DR), or bi-xenon lenses (marked DC / R). In the second case, the switching of modes is carried out using a curtain that forms a beam: it is controlled by an electromagnet.
The legal side of the issue
Despite the fact that the article is technical in nature, we will consider some legal subtleties that allow the legal use of xenon in a car. There is nothing to tell about standard schemes: if gas-discharge headlights are installed by the manufacturer, everything is legal.
The technical regulation of the customs union states:
1. It is allowed to install headlights with gas-discharge light sources in vehicles discontinued. At the same time, headlights from another model are used.
2. If you yourself installed (or rather are going to install) xenon modules in the headlights intended for halogen lamps, approval in the traffic police is necessary. This procedure includes technical expertise, trips to authorities and some financial costs (in addition to the cost of equipment). After that, a mark is made in the TCP on making changes to the design, and ride on health.
Are you going to legalize homemade xenon, or will you remodel the headlights in such a way that no inspector will get to the bottom - the work should be done in accordance with the standards.
- Color temperature must comply with technical regulations. Optimal value: 4000K - 5000K. This is the natural color of the sun, perfectly illuminates both wet and dry roads. It is not striking to road inspectors, unlike blue or purple, which in turn also poorly illuminate the path.
- At a light level above 2000lm (starting from a power of 35W, any gas discharge headlight exceeds this value), the headlights must be equipped with an automatic tilt angle corrector, and a cleaning system (washers, wipers).
- The use of corrugated headlamp glasses is not permitted.
Well, of course, the cut-off border of the dipped beam (in our case with a broken right section, the so-called step) should be correctly adjusted.
The theoretical calculations are completed, we proceed to the practical implementation of the project
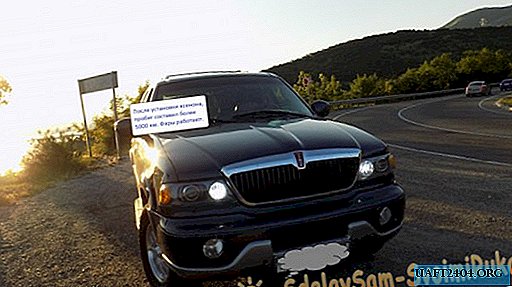
Car - Lincoln Navigator 2000 release. To say that in stock performance shines badly is to say nothing. The car is discontinued, but there is no way to install xenon headlights from another model. Therefore, we install bi-xenon modules.
Since the process is not fast, and you need to drive every day, new headlights from the Taiwanese manufacturer DEPO were purchased for experiments.
This solves a number of problems:
1. While we install the lenses - the car is on the go with old headlights.
2. If "something goes wrong" - you will not be left without a head light.
3. If necessary (problems with the traffic police, inspection does not take place ...) you can always roll back.
At the same time, I updated the old optics with clouded glass. Fortunately, the price of the kit is not too biting.
First of all, new headlights must be opened. With rare exceptions, glass is attached to the body with sealant. When heated to 200 ° C - 300 ° C, the adhesive softens and the headlight is easily disassembled. There are many ways: put in the oven, put in an airtight box and heat the air inside with a hairdryer, use an infrared heater such as "UFO". I chose local heating with a building hair dryer.
The disassembling tool is standard: a screwdriver, pliers (for removing locking rivets, whoever has it), toothpicks as spacer wedges, and a hairdryer itself.

The headlight is inspected along the contour of the glass for additional fasteners: screws, rivets, staples. Then it is laid on a soft surface, and heating begins from the lightest angle.

After a while, the sealant lends itself. Gently pry with a flat screwdriver, insert a toothpick into the slot.

When the glass moves a sufficient distance, you can fix the gap with a rag.

We warm up the last section.

Separate the glass, leave the headlight to cool.

Heating is controlled visually. Plastic should not change color, and become soft. It is better to choose a lower temperature and warm longer.
Now about the lenses
I chose a bi-xenon kit from the Chinese manufacturer "CBX". This is an enterprise, on the conveyors of which optics for various automobile plants are produced. My kit turned out to be a Chinese replica for Volkswagen AG, for some AUDI model. Of course, no original logos - this is a pirate factory clone. Workmanship (especially lenses) is top notch. Masks (decorative pads that cover the structure) in my case came from VW Tiguan. Of course, made in China.

The lens diameter is 3 inches. Base - standard D2S. Lamps bought branded, PHILIPS 85122 35W, color temperature 4600K. Ignition blocks (ballast) used from the Korean company Sho-Me 35W. The installation is external, the benefit of the bumper can be anything to hide. The set of ignition blocks includes all the necessary wiring, so there is no point in rewriting the connection instructions. When buying such a kit, you will receive all the necessary documentation.
Tip: If you plan to legalize the rework later, you need to take a certificate for each component. Sellers know what kind of documents.
To install bilins in the headlights, a conventional bench tool is used (see photo).

Dremel helps a lot with a set of cones, cutters and cutting discs. I also used a drilling machine (more precisely, a stand for an electric drill).
We disassemble the headlight, having previously marked the center of the halogen lamp on the glass. If you plan to keep the chrome-plated filling, you should work in cotton gloves.

The lens is fixed inside using a bracket (frame). An individual solution (for different headlights), based on my example, you can develop your own design. I left the standard mount reflector. Since I do not recognize the screwing of biline modules with studs onto a plastic reflector, it was decided to install 3 mm aluminum plates.

Before you begin processing aluminum, you should work with temporary patterns. In my case, a foamed 4 mm thick PVC sheet. Having screwed the template to the reflector (in the standard mounting locations), I plotted the basic coordinate axes intersecting at right angles in the center of the hole for the lamp.

This is necessary to center the biline module. Then, after measuring the distance between the ears of the module, I made and marked out the second template.

And he cut it out with mounting holes for installing the bilins case.

Combining the coordinates of both patterns, we get the exact location of the biline, relative to the mount reflector headlights. This is important, the center of the lens should be aligned with the halogen lamp. Otherwise, the adjustment range may not be enough.

We assemble the template plate: we install the standard mount of the reflector and the biline lens body.

We try on the headlamp housing.

If deviations are detected (even 1-2 mm), it is easy to correct this on the PVC plate.

Then we make the second template, made of stiffer material. It is necessary for the precise adjustment of the headlights already on. Altering the finish aluminum plate is too expensive. I took pieces of laminated acrylic, such are used in advertising structures. Tough enough, and can be easily redone when fitting.

We assemble the structure, install it in the headlamp housing.

Adjust the center point of the optical axis.

Check the correspondence to the mark on the headlight glass.

After fitting a rigid template, we make an bracket from an aluminum plate.

I marked the central hole on the drill press.

Then finalized with a dremel.

Similarly, we make the remaining technological holes.


Once again I am convinced of the use of dremel. A simple file would have to work for more than one hour.
We cut the thread for the studs under the biline. I used M6 bolts as studs. I recommend buying high-quality fasteners, the vibration load is quite serious: the lens is glass, it weighs at least 100 grams.

We assemble the design for the final fitting.

After assembly, install the headlight on the car, turn on the light, check the adjustment ranges. A full-time reflector and a biline mask are not yet used.


Having set the lens in the correct position (from the point of view of beam adjustment), mark out the cutouts on the decorative frame under the mask. We use a cardboard template for layout.

This process is purely individual, and depends on the design of the headlamp, and your chosen design decision.

Cut the excess plastic with a dremel.

A cutting disc cuts plastic like butter.

Test fitting - and revision.

Finished cutouts carefully processed with sandpaper.

We try on - everything is accurate, the distance to the mask is the same, the adjustment range is sufficient: the plastic does not cling to each other.

We assemble the headlight: on the left - after alteration (without a standard reflector), on the right - a standard headlight.

Since I decided to keep the regular reflectors behind the mask as a decorative element, we are finalizing the reflector. Marking holes for bi-xenon module.

We drill with a drill.


After finishing with a file, we get a hole of the correct shape. Aesthetics does not matter, this place will be hidden under a mask.

We collect, try on.

The next step - getting rid of chrome
Again, this is an individual decision. I decided that the lights inside should be the color "gray anthracite", with the exception of the reflector dimensions - DRL and chrome masks. Chrome does not need to be removed; we glue the surface with vinyl film. In my case, a fairly high-quality product from KPMF.
We wash the components with dishwashing detergent.

Rinse with distilled water, leave to dry. If you leave chrome - washing is also done. You do not need to wipe it; after drying the distillate, no spots remain.

We make templates for marking a vinyl film.

Cut pieces with a margin.

Tip: If you do not have experience working with film, entrust this process to professionals.

We glue the reflectors with a building hair dryer.


For pasting the headlight frame, it is better to fix it on a temporary stand.

Quite a difficult job, but quite doable.

Getting to the final build
All fixtures must be fixed with lock washers, or other thread locks. If something loosens during operation, you will have to disassemble the headlamp again.

Installation of factory fasteners.

Check the reliability of tightening nuts.

Install the bi-xenon module.

Since in my design, fixing bolts are visible from under the mask, I decided to install an additional decorative plate. As usual, first a cardboard template.

Brackets for fastening from aluminum 1 mm thick.

We cut the plate out of it.


Trying: fasteners are not visible.

We cover the plate with vinyl. Pre-apply the correct marking: DC / R and the European certification mark. There will be no unnecessary questions from the traffic police inspectors.

Marking is printed on a good laser printer. Selects the type of media: "OHP film." For the year of use, nothing has come off, it looks like a factory one.
We collect the headlight, after removing all the dust from the housing with a vacuum cleaner, and wiping the lens.

Wearing gloves, set the chrome mask.

We mount a decorative insert. We check all the fasteners. After installing the glass, this can not be done.

We collect the wiring. Carefully start the high-voltage wires into regular rubber couplings, fill with sealant, fix with a heat-shrink tube.

It is advisable to place a marking on the body that matches your headlight and xenon filling. Everything should look believable, otherwise it makes no sense to start these decorations.

After the final test of the headlights, we glue the glass. The housing must be installed horizontally.

We lay in the cavity any suitable sealant for the repair of headlights (windows).

Glue the glass, leave to dry for 24 hours. Can be fixed with masking tape.
Total:
All the work spent four days off. One full day was spent on “inventing” and testing technology. The second headlamp was assembled in a day.

The light beam can be adjusted either according to the instructions for your car (in this sense, xenon is no different from halogen). You can set the cut-off border according to the tables attached to the Regulations of the customs union.
After setting up, I went through a technical inspection (for compulsory motor liability insurance). I asked to carefully check the correct installation of the headlights. Everything turned out according to GOST.
After a run of 5000 km, only a positive experience. Lighting is even, bright, without blueness. No angry blinks from oncoming drivers have been noticed (after all, the correct alignment is important!). Headlight washer installed additionally. Crashed into the bumper nozzles in the tank of the second pump. I have a full-time headlight corrector.
Share
Pin
Tweet
Send
Share
Send