Share
Pin
Tweet
Send
Share
Send
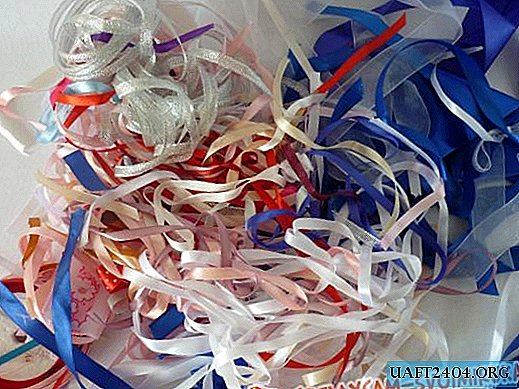
But there is another way out that will correct this situation. In this master class, we will very simply make an organizer for ribbons.
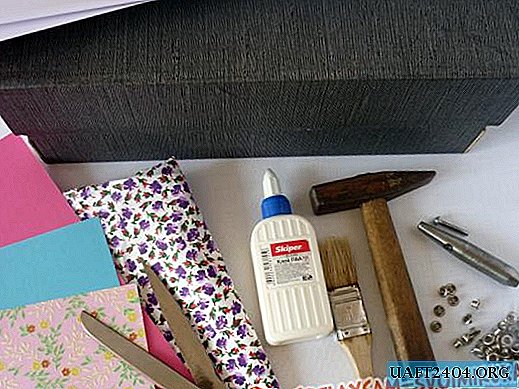
To create it, we need:
• an empty shoe box;
• the cloth;
• whatman;
• PVA glue;
• color cardboard;
• eyelets;
• tools for installing eyelets;
• brush.
Prepare the box with the lid attached. With such a box it will be more convenient to work. Cut off excess cardboard on the lid so that its edges are even.

Cut blanks from whatman for all the outer sides of the box except the bottom. Apply a thin layer of glue to the surface of the box, and then glue the workpiece, pressing it well. Pasting with a light paper is necessary only if the color of the box is dark and the fabric is light.

Then we glue the entire surface with a cloth. Cut the fabric to fit the back wall and allowance cover. Apply glue to the wall and cover and glue them. Smooth the surface so that it is flat. Glue the bottom allowances to the bottom.

Scissor the corners at an acute angle.

Glue all allowances to adjacent walls.

This should look like the inside of the lid.

Cut the fabric with a length equal to all sides of the box with allowances and a width equal to the height of the box with allowances as well. Glue all sides of the box to the fabric, leaving allowances free.

On both sides, allowances are bent in a straight line inward and glue the edges.

We also cut corners at an acute angle and seal all the allowances inside the box and to the bottom.

Cut a piece of cloth the length of a box and with allowances. It will be a spine. Bending the allowances inward, glue the spine so that one half of it is on the wall and the other half on the lid.

Cut the fabric with the size of the bottom and with allowances. Glue in by gluing loose fabric to the walls and forming corners. The surface must be smoothed. Now we need color cardboard. We seal them with the inside of the lid, so as to close the allowances.

We paste over the walls with colored cardboard, pressing well for a few seconds. It can be used for gluing cardboard hot melt adhesive.

We turn to the installation of eyelets, which must be done on a hard surface, which is not a pity. There are special tools for installation, if you don’t have one, then you can do with a standard and simple set. First you need to punch a hole in the desired location. A hole punch or object that can penetrate the surface can help.


Insert the grommet into the hole. The cap should be on the front side, and the leg should look at you. Pick a nail whose diameter is gradually expanding and it is wider than the diameter of the legs. Insert the nail into the leg and hammer with a hammer. The eyelet of the eyelet will diverge. At the end, lightly tap on it. The master class uses a special tool for installation.

Insert eyelets of the diameter you want.

Gently fold the tape. It is better to fold the coils at the very bottom, sticking a ribbon through the hole. Now the tapes are in perfect order!


Share
Pin
Tweet
Send
Share
Send