Share
Pin
Tweet
Send
Share
Send
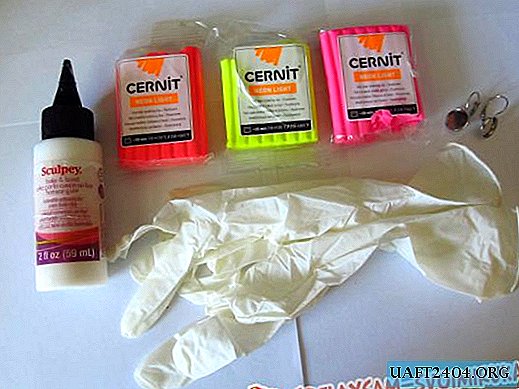
Note: in my opinion, Zernit clay is ideal for this work. It softens quite simply, but a very thin petal can be formed from it, and it is also very strong and light.
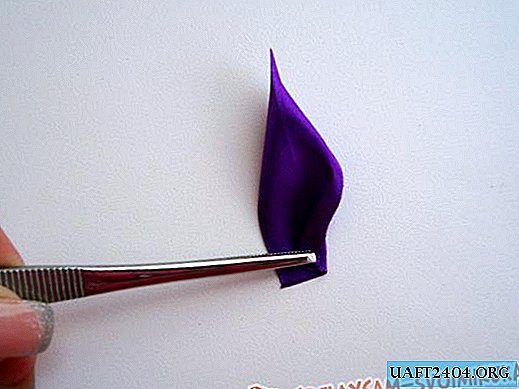
2. From a piece of acid-yellow plastic, after putting on the gloves, we form a drop, rolling the plastic between the index and thumb. Depending on the size of the future flower, the size of the "drop" may vary.

3. We make 2 preparations.
Note: gloves will make work more accurate. Fingerprints will not be visible on the petals, and dust and dirt from the hands will not be deposited.

4. We take the plastic of acid-coral color and form small balls (2-4 mm in diameter), such circles should be made in such a way that the petals of this color will be arranged in 2 rows - in the first there will be 3 petals, and in the second - 5. I.e. all you need to roll 16 balls.

5. Each ball must be spread between the index finger and thumb and turned into a petal.

6. Next, on the narrow part of the drop-blank, we begin to attach lap coral petals. Attach the first.

7. Visually easy to see how the second petal is attached.

8. We fix the third petal in the same way - with an overlap on the previous one.

9. In the same spirit, we continue to fasten the remaining petals, tightly pressing them to the base.

10. The next step is to make rose petals. They should be about 22-24, i.e. 11-12 for each flower. We fasten the petals in 2 rows and get the finished flower.
Note: It is better to mount the petals of different sizes. In the first rows - smaller, in the last - larger.

11. Now you need to cut off the tail, which has become from the base of the drop and the petals. To do this, knead and pull the plastic, which is located at the very base of the flower, with your fingers.

12. Next, we cut off the “tail” with the blade, while the cut-off area should be approximately equal to the cabochon mounting area on the base for the earring.

13. We take glue-gel for baking and grease the inner surface of the base of the earring.
Note: glue or gel of a transparent color will help the flower to fix itself well on the platform. The most widely used for these purposes is Fimo's transparent liquid gel and Scalpi's thermo-adhesive.

14. Immerse the cut bud on the base and send to bake for 25 minutes at a temperature of 120 degrees (depending on the type of polymer clay used).

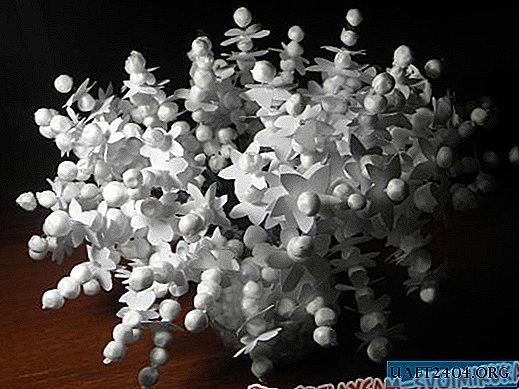
15. The finished result!

In your work, you can use absolutely any color that suits you. The size and purpose of the flower can also be changed: to make a beautiful and bright ring, a brooch or pendant is not difficult, you just have to buy the necessary accessories.
This jewelry is perfect for both a little fashionista and representatives of stylish youth. The main thing is to choose the right color combinations
Share
Pin
Tweet
Send
Share
Send