Share
Pin
Tweet
Send
Share
Send
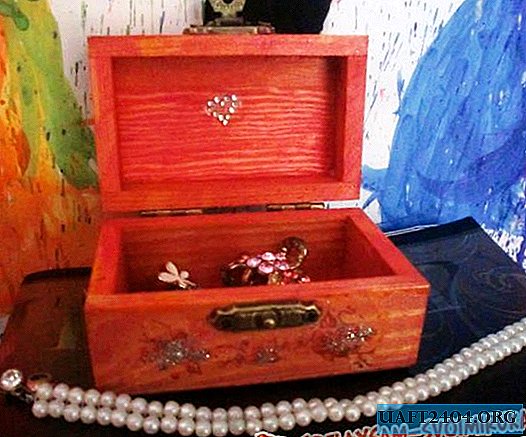
To decorate the chest you will need the following materials and tools:
-Wooden chest;
-Watercolor paints;
-Colorless varnish;
- Brushes with artificial hair (2 pcs.);
-Dry sparkles;
-Small rhinestones;
-PVA glue;
- Napkins with a fine pattern.

First, paint the chest with watercolors with the color you like best. Try to use a minimum of water for this, the tree still does not accept it in large quantities.

Do not forget about the sides and inner faces - they will be the same color as the top of the chest. Let the chest dry.

Now proceed to the most difficult and painstaking stage - tearing off the pattern along the contour. In order for the drawing to fit neatly to the surface of the chest, it needs to be torn off, not cut out, so this can take a lot of your time. For owners of long nails, this will be much easier. Leave a contour no more than two mm.

Napkins usually consist of several layers, and for crafts the layer should be as thin as possible. Detach the extra layers with your fingers (usually two) and set aside the thinnest layer with the picture. Such napkins are made in Germany and are often sold at exhibitions on decorative art. Sometimes you can see them in industrial stores.

Repeat the same procedure with other napkins. The more drawings there will be on the chest, the more beautiful, therefore, several napkin elements will be needed.

Now start sticking the drawings on napkins. Do this very carefully so that the thin cloth does not tear under the pressure of the brush.

Until the PVA glue has dried, apply dry sparkles with another brush. The sparkle should not be too much, otherwise they will block the picture.

Pay attention to all the side faces of the chest and apply sparkles with a pattern wherever you can - on the sides and back, because it will be much more beautiful.

Now coat the chest with colorless varnish. One coat will not be enough, so as soon as the first coat dries, apply two or three more.

Now place rhinestones on the free surface of the chest. They can be attached to a dry varnish, or you can attach with ordinary glue or colorless nail polish - as you wish.

Do not forget about the inside of the chest and lay out a beautiful ornament from small rhinestones. Once you open the lid of your treasury, the effect will be great.

Wonderful chest is ready! The whole process takes very little time, most of all you spend it on processing napkins. As you can see, making such a craft is not difficult at all, and all materials are available. If you wish, you can use the decoupage technique to decorate other hard surfaces, and not only wooden ones.

Share
Pin
Tweet
Send
Share
Send

