Share
Pin
Tweet
Send
Share
Send
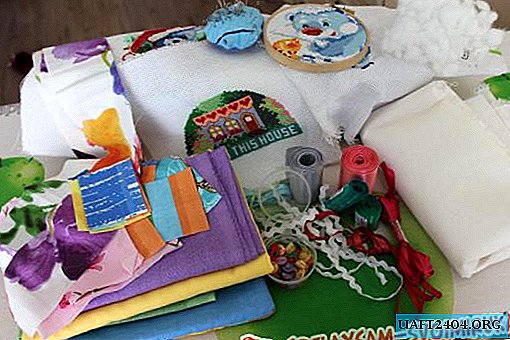
We will need:
- Shreds of fabric / fabric / embroidered fabric.
- Doublerin (for product strength).
Fillers:
- insulation (for tacks).
- holofiber / cotton wool (for pillows).
- Slanting inlay (can be made from fabric or purchased ready-made).
To decorate: satin ribbon, ribbon.
Do the tricks:
Step 1: Prepare 4 square pieces of 10 × 10 fabric. One of these squares can be cut out of embroidery by placing the pattern in the center. Also cut out from doubler, fabric and insulation square 18 × 18.

Step 2: Smooth the shreds 10 × 10, combining the colors and choosing the best option.

Step 3: Sew together in pairs of 2 squares.

To make the finished product look neat, iron the seams.

Then we grind together 2 resulting rectangles and get one big square - the “cover” of the tack.


Also iron the seam.
Step 4: To ensure that the product does not lose its appearance after washing and lasts longer, you need to use doubler: with an iron we fix the square of doubler on the back of the cover.

Step 5: Layering the future tack in layers:
1 layer - fabric 18 × 18
2 layer - insulation 18 × 18
3 layer - cover

Scissors slightly round the corners.
Step 6: We sew the edges with an oblique tape, not forgetting the allowance under the hanger.


Ready product.

Making pillows:
Pillows are sewn similarly to tacks. At the same time, you can sew the pillow base stuffed with halofiber and the pillowcase cover separately. Then washing and ironing the product will not cause difficulties.
Step 1: For the base, cut out a 20 × 38 rectangle and a holofiber. Fold the rectangle in half with the front side to the front side. Sew along the edge, leaving a segment of 7-10 cm unstitched. We turn it on the front side, stuff it with holofiber and sew

Step 2: For the cover, cut out 12 squares measuring 7 × 7, a square for the front (with a picture or embroidery) 12 × 12, a square for the back of 20 × 20, a 6 × 20 rectangle.

Sew together the top 4 squares, the bottom 4 squares, then 2 side squares in the middle.

Iron the seams and collect the front part pattern. Optionally, you can decorate the resulting fabric with a satin ribbon or ribbon.
Step 4: Putting the Pillow Case On. We impose the wrong side to the wrong side of the square 20 × 20 and the front part. To the front side of the back, we fit a 6 × 20 strip from the wrong side to the front.

Step 5: Sew the pillowcase along the very edge.

Cut corners.

Step 6: Gently turn inside out, stitch at a distance of 0.5-0.7 cm from the edge.

We put the resulting pillowcase cover onto the base.

Share
Pin
Tweet
Send
Share
Send