Share
Pin
Tweet
Send
Share
Send
Tools and dyes:
• White water-based paint
• 3 types of colors: beige, olive and black
• Masking paper tape
• Foam roller
• Thin brush
• Tray for paint
On the previously prepared wall (putty and primed) you need to apply a base coat of paint. Mix a beige color and a white emulsion of water. Pour the resulting dye into the bath and roll it onto the surface using a foam roller. It is best and more correct to apply the base in 2 layers.

Allow the paint to dry completely. Then stick the masking tape in such a way that you get strips of different sizes and thicknesses.

Glue the paper tape on the level or mark the dashed lines with a pencil, along which you can maintain the horizon and vertical stripes.

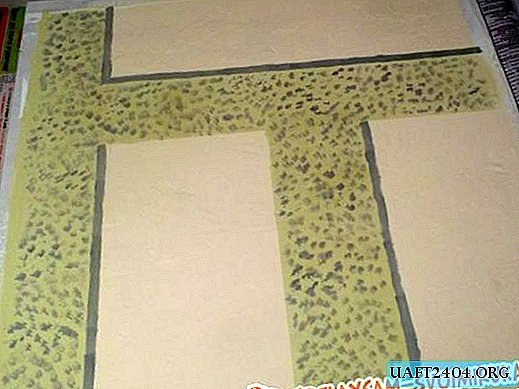
Make a new portion of the dye: add olive color to the remaining beige paint and mix thoroughly until smooth. Dip the roller in the paint and roll the marked stripes between the tape. Excess paint will remain on the paper and the strips will be even.

Let the olive tone dry and remove the tape. Then, with the color, extend the strips that the paint did not hit in the same way (adhesive tape + roller).

After the olive strips have dried, make the third portion of the dye: add very little black tint to the remaining olive-beige. You should get a nice gray tint (as you can see, the previous dye is used to the full, so try to calculate the amount of paint correctly). Dip a thin brush slightly into the paint and apply the color by “facing”.
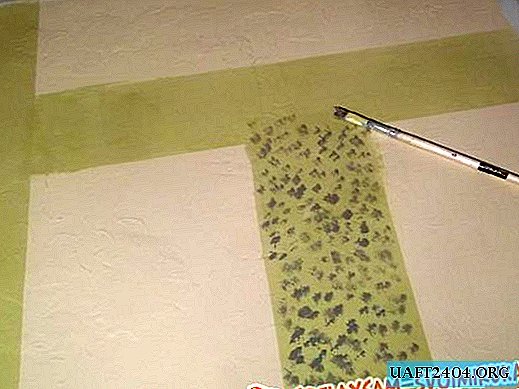
To complete the "picture", you need to give volume to our "masonry": draw gray stripes with the same thin brush, imitating the shadow of the "granite". All painting is ready!

You must admit that this option of surface finishing looks very original and truly exclusive, because the author’s painting is "made by yourself"! How can one not boast of an interesting decor in front of the guests of your comfortable home?
Share
Pin
Tweet
Send
Share
Send

