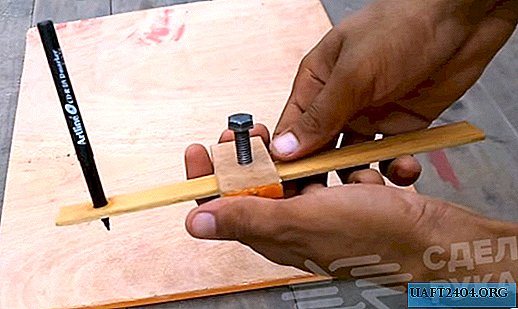
With this home-made device, you can draw straight lines parallel to the side, edge or end of the board or other wooden workpiece. The distance necessary for marking is established by measuring from the edge of the workpiece to the head with a marker or pencil.

The construction of a homemade marking tool is quite simple - it is a movable wooden block made of two small pieces of plywood, to which a rod (rail of a suitable length) with a working "head" is attached.
To make such a simple carpentry device for applying precise marking on a workpiece made of wood under the power of each master. And this will take literally 5-10 minutes. This tool is very easy to configure and convenient to use, but most importantly - it can be made from improvised materials.
The main stages of work

We cut out two identical squared cubes from plywood. In the central part, you need to make a small depression along the width of the rod. Then in two halves we drill a hole for the fixing bolt, and at the end of a wooden rail (rod) - one hole for a pencil or marker.

Next, we glue two pieces of plywood together, so that between them we get a small rectangular window. This will be the movable tool block. We insert a wooden rail into it, at the end of which we fix the marker, and press it with a fixing bolt. Now you can draw straight lines on the workpieces.