Reliable, functional, and sometimes aesthetically beautiful, a clamp is always needed in any workshop. To make it even for any beginner master or a person far from a locksmith theme.

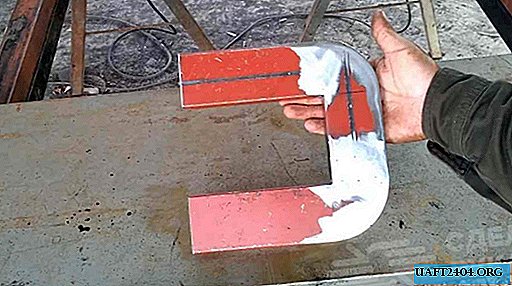
There are no strict requirements regarding the shape of the product. Most importantly, the clamp should be similar to the letter "C", and this is enough.
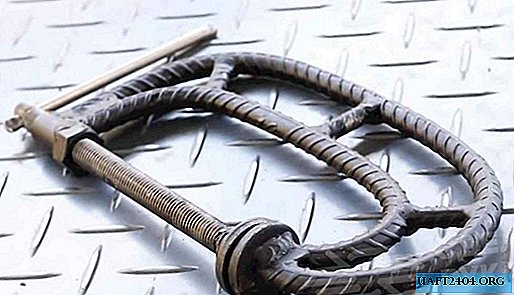
For manufacturing, you can use all kinds of metal waste, such as pieces of reinforcement, plates, nuts, pieces of studs and a pipe segment.

The main stages of work
We bend a piece of reinforcement with a yew, in the shape of the letter "C". We perform the same procedure with the second reinforcement, comparing it with the first. First you need to reduce its size so that it fits inside the first workpiece. We weld both parts together.

Installation of stiffeners is one of the most necessary things in this homemade product. After all, they will bear almost the entire load on tension and compression. A minimum of three ribs must be on a clamp of this shape.

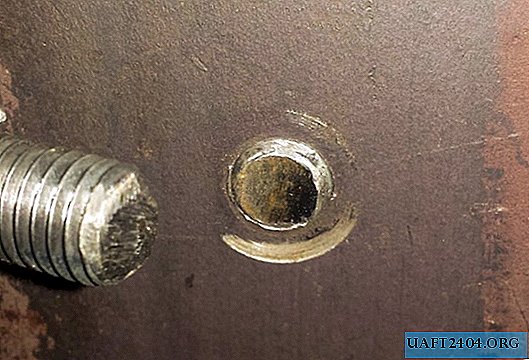
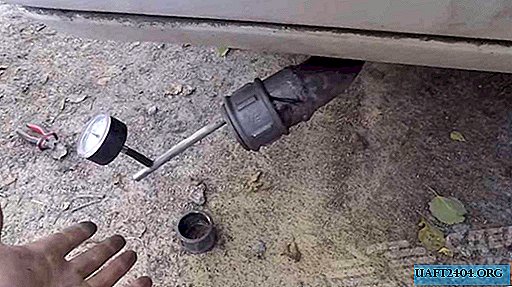
We weld a piece of pipe to one of the edges. This will be the guide for the winch (stud). We fix the nut on the edge of the pipe to control the compression level (so that the knob does not hang). Opposite the nut, weld a metal piece of the plate.

We prepare the hairpin by sharpening one edge according to the drawing and the second grinding for drilling holes for the shaft of the winch. We insert the core and expand its edges. Having installed the stud in the clamp, we weld to its edge a piece of pipe with a plate.

We heat and expand one edge of the tube in the shape of a hairpin. We paint the product, and the homemade product is ready for use. The detailed manufacturing process of the clamp from the reinforcement can be seen in the video below.