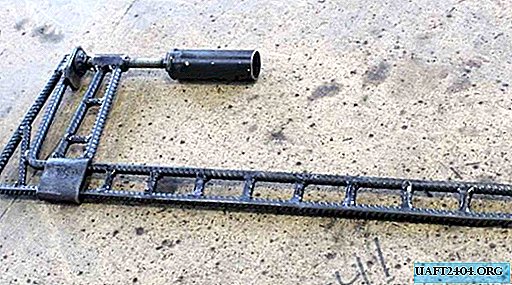
In this review, the author shows the process of making a home-made clamp for the workshop. The main material is reinforcement.

Additionally, you will need: a piece of a round pipe, a bolt with an extended nut and pieces of metal.
First of all, the author cuts a piece of a round metal pipe, and with the help of a sledgehammer flattenes it.

Then it will be necessary to bend the reinforcement bar into the F-shaped workpiece. We put on a flattened pipe segment on it.

The main stages of work
At the next stage, we determine the width of the tire (so that the pipe can move freely along it) and weld the transverse inserts.

After that, the fixed clamping jaw will need to be welded to the upper part of the clamp frame. It can be cut from a piece of metal.

Next, we wind the extended nut onto the bolt. The author welds a metal ball to the end of the bolt.

Then it will be necessary to make a clamping "nickel". He must be mobile.

Now that the main parts are ready, the author proceeds to manufacture the movable part of the clamp. See the photo below.

At the last stage of work, only the handle will be welded to the cap of the bolt. The author uses a piece of round pipe.

You can watch more details on how to make a clamp from reinforcement with your own hands in the video on our website.