The following week he devoted to calculating the subwoofer. I downloaded several programs for calculating subwoofer enclosures (DLSBox2000, JBL-Speakershop, WinISD ...) Most of all I liked the DLSBox2000 program. With its help, and calculated the sub. And here’s what happened - the efficiency of this design (FI) for my speaker is 76%, the volume is 37 liras (external dimensions 45x35x35cm.), The bass reflex is 75x100mm. (diameter / length).
Then he drew a sketch on paper, and began its production.

He twisted all the walls with screws 50 mm long. All compounds are seated on PVA glue (advice - no need to regret the glue, it will squeeze out excess). Inside for greater reliability, the seams were coated with silicone sealant. In principle, this is not necessary, but it is better to miss and forget than then disassemble again.


Then proceeded to putty. Putty was used automotive, two-component (You can make putty yourself, by mixing small sawdust of wood and PVA glue, as an option). When the putty was dry, I polished the body to an almost perfect plane.


Then he cut out holes for the bass reflex, socket, under the handle-pockets.


Putting a subwoofer in order to see how it sounds.

All my doubts about the correctness of the calculation of the volume of the box were dispelled in an instant - the self-made subwoofer played soft smooth bass. After making sure that nothing whistles anywhere, I took off the “fittings” and proceeded to pasting the case with self-adhesive paper with a leather texture. Collected.


Subwoofer manufacturing costs:
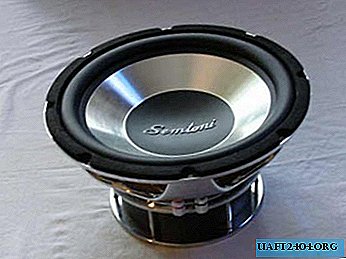
Woofer Semtoni 10 ”(25 cm) 350w (rms, max) - 1100 rubles.
Chipboard 20mm. - free, found in the attic
PVA glue - free, already in stock
50mm screws. 100 pieces. - 26 rubles
Silicone sealant, transparent - 59 rubles
Sealant gun - 40 rubles
Socket with terminals - 65 rubles
Acoustic wire 1m. - 60 rubles
Phase inverter 75x100mm. - 40 rubles
Handles "Pockets" 2pcs. - 100 rubles
Total about 1800 rubles.