Share
Pin
Tweet
Send
Share
Send
Will need
Instruments:
- The Bulgarian (UShM) with diamond cutting and thin section disks;
- Drill with a cutting disc;
- Screwdriver, knife, pliers, tape measure;
- Silicone gun;
- Soldering iron, heat shrink;
- Hot glue gun;
- Gas-burner
- Spatula for kneading and applying cement mortar.
Materials:
- TV with a whole picture tube (without cracks on the glass);
- Sheet glass, thickness 4 mm;
- Silicone aquarium;
- LED backlight with adapter and toggle switch;
- Polystyrene waste;
- Cement-sand mixture with a container for mixing mortar;
- Artificial soil and algae.
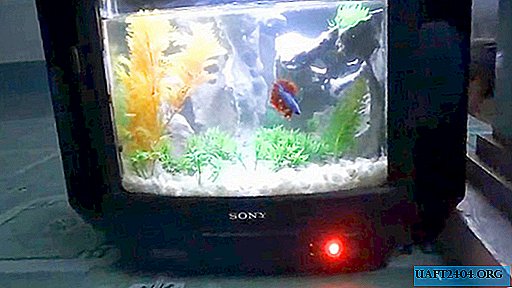
Making a TV aquarium step by step

From the TV itself, we need only the body and part of the picture tube. We remove the back cover by unscrewing the fixing bolts from the case, and then release the cathode ray tube from the adjacent loops, anode, circuit boards and pull out the picture tube.
We remove the diverting magnetic coils and the electrical wiring of the cables so that only a cleaned glass bulb remains.

Gently break the sealed end of the neck of the tube with pliers to let the air in.

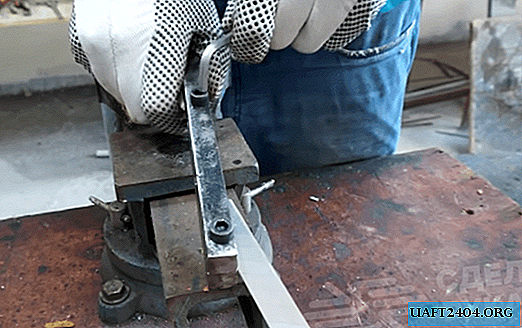
Using a grinder (angle grinder) we cut off the tube of the tube to the level of the mounting metal frame.

Having separated the tube screen, we remove the shadow mask and wash the glass from the phosphor coating. This can be done with plain water and rags.
Then, as much as possible we trim the place of the cut on the screen with a grinding disc and angle grinder. The smoother the cut, the stronger the glued joints of the aquarium.

The plastic case of the TV should be thoroughly washed. Ideal for this is a high pressure washer or a regular hose supplied from a tap with water.
Having thoroughly dried the plastic, we insert the screen in its place, screwing it with screws. So our aquarium will be securely fixed in the TV.

It was time to cut out the rest of the aquarium. We measure, draw blanks on sheets of glass 4 mm thick. Using a glass cutter and a ruler, we carry out cutting. We should get four glass walls.

For gluing aquariums, masters advise using a special aquarium silicone. It is designed for thin-layer seams that withstand quite strong pressure and tensile loads. For reliability, we glue not only the joints themselves, but also the areas adjacent to them outside the walls.

To compensate for the height of the aquarium’s landing relative to the TV case, we stick a small rectangular block on its lower part.

On the top cover of the TV case we make a slot for convenient maintenance of the aquarium, cleaning and filling with water. After the silicone dries, we assemble the TV case by screwing it onto the self-tapping screws. Now it looks as if after repair))

The screen will be the only viewed wall of the aquarium, so it will not interfere with additional lighting. We will make it from several LED strips connected to the adapter. Solder their contacts to the terminals of the power supply, and check the operation.


As a starter we use a small toggle switch. We fix it on one of the legs of the TV with hot glue so that it works from the TV’s power button.
Decorations for aquarium
An empty glass box can be turned into a piece of the mysterious deep-sea world, with unusual soil, algae and rocks, streaked with water. And now we will tell you how to do it yourself.
Rocks will be made of polystyrene foam. Used packaging from household appliances or unnecessary scraps of sheet material will do. We burn them with a gas burner or a lighter. Work with this material very carefully, with gloves and a respirator, so as not to burn yourself and breathe in toxic fumes. It melts very easily, even at a distance from an open flame.

We form through holes by melting, and give the workpieces a pointed shape of rocks and crevices. In a separate container, prepare a dry mixture of approximately the same parts of cement and sand, and mix it with water. You should get a solution of the consistency of liquid sour cream, slightly draining from the spatula.

We dip our billets in a container with a solution, and carefully we season them so that the surface takes the shape of a stone. After that we set it is dried in the open air, re-watering the solution.

The algae in our aquarium will be artificial, in different shades and sizes. They are easy to purchase at pet stores or in the market. There you can buy a little colored soil, for example, a light shade. We glue over algae bushes with soil, creating our own author’s compositions. Due to the weight of these pebbles, they will hold firmly to the bottom.

We fall asleep soil. The dried-up “cliffs” have acquired a light gray natural shade, they can be used to arrange the background part of the aquarium, and algae can be placed in the foreground.

It remains to fill the aquarium with water, and place your favorite pet in it!


Share
Pin
Tweet
Send
Share
Send