Share
Pin
Tweet
Send
Share
Send

Materials
Materials for creating toys:
- fabric scissors;
- threads for sewing to match the fabric or white;
- synthetic winterizer;
- satin ribbons for the tail and head;
- button with two holes (future patch);
- fabric of yellow and flesh tone;
- buttons, rhinestones for decoration;
- fabric marker black.
We Sew Pig - the mascot of the new year

Need to draw a sketch. A saucer and a glass come in handy for its creation. Having circled kitchen utensils on a piece of paper, we get the body and head. Ears and legs are easy to draw on your own. The body with the legs is cut in four copies of yellow fabric.

The fabric is placed under the paper pattern. Both segments should look at each other from the inside. So that the pattern does not move, it is fixed with needles.


Head in duplicate made of bodily tissue. Ears - 2 copies from yellow fabric, 2 - from bodily.

Workpieces are connected in the desired sequence.

It is easier to stitch blanks on a sewing machine, but for one toy you can do with hands and machine seam technique.

The blanks are sewn together from the wrong side, then they are turned out and ironed well.

In the left holes of two parts of the body and head, a packing is laid. Parts are stitched to the end. During the suturing of the head, ears are inserted into it.

To create a muzzle of a mumps, it is important to choose a button of a suitable size with two holes. Sometimes this is not. It is easy to replace it with a homemade button. You will need baked clay for children's creativity and dumb efforts.

While the patch is baked (5-10 minutes at a temperature of 100 ° C), a tail is made. Two satin ribbons are joined together, tied in a bow with one long tail.
Important! The ends of the ribbons must be set so that they do not open.

The tail is sewn to the back of the pig. It will take a long needle.

You can twist the ribbons and sew the tip above the bow.

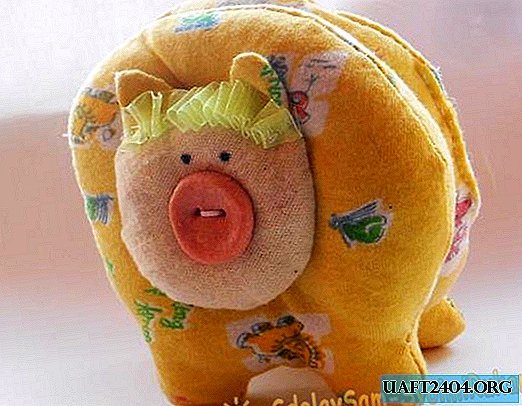
Piglet is ready - a muzzle is formed. Two points are applied with a marker - eyes, in the center a homemade or real button is sewn. The stitches in place of the ears are easy to hide with a satin ribbon folded in accordion.

At the final stage, all three parts are sewn together. You can stitch them individually or all three at once. The tail was well complemented by a button in the form of a ladybug.

It turned out a stable cute pig. Its task is to brighten up the new year of its owner.

Share
Pin
Tweet
Send
Share
Send

