Share
Pin
Tweet
Send
Share
Send

Necessary materials
- - colored paper in brown and green;
- - ruler;
- - a pencil;
- - scissors.

Origami Christmas tree manufacturing steps
1. Our Christmas craft will have four parts in the form of modules, which are then connected to each other to obtain one volumetric figure. So, cut out a square 12 x 12 cm from brown paper, and three different sizes from green: 16 x 16 cm, 12 x 12 cm and 8 x 8 cm.

2. We use now only sheets of green. They will all add up the same way. Therefore, you can create modules at the same time or in turn. So we fold diagonally two times.

3. Then open and fold the booklet.

4. We repeat the bend only on the other side of the workpieces.

5. We reveal. On both sides, we fold the workpiece along the fold lines and get such figures in the form of a "double square".

6. Bend the bottom corner up to the top of the workpiece. We do this on each module. Turn over and do exactly the same on this side.

7. Turn the fold from the left side to the right side and again bend to the top the bottom corner of the Christmas tree blank.

8. Turn the crease again. Only this time on the left side. Bend the bottom edge of the module up.

9. The result is such triangles.

10. We bring a vertical fold to the lower left side of the workpiece.

11. At the bottom, we also make a fold by running our fingers along the fold. Get a little triangle. It is laid aside one way and the other in the same way. We bend it up in the left side to get a solid base for the module below.

12. Then go to the next side. We do exactly the same.

13. We do this with the other two parts and then hide the small corners inside the crafts.

14. Ready-made modules for the Christmas tree will look exactly in the form of pyramids of different sizes.

15. Connect all the green parts of the craft to each other.

16. Then create a Christmas tree base from a brown square sheet of paper. We add it at the beginning in the same way as the first elements. We get the "double square".

17. Bend the right edge of the paper to the vertical line of the module.

18. Raise the lower triangle to the fold line.

19. Make a fold and lay the triangle down. Bend the side to the left side.

20. The next right triangle is again bent to a vertical line. Bend up the bottom corner. Having made a fold, bend it down and turn the workpiece over.

21. On the other hand, we create exactly such actions with paper, as in stage No. 17-20. We get such an elongated shape module.

22. We attach it to other parts of the craft to get the foundation.

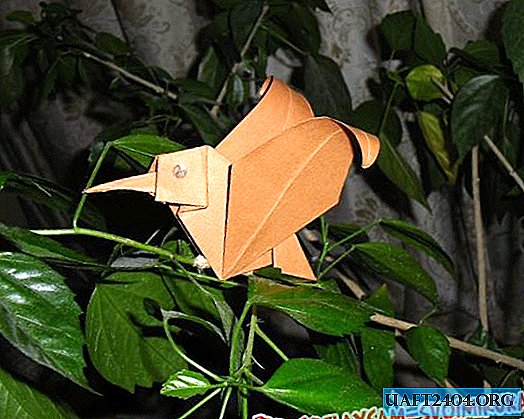
23. The modular Christmas tree in the origami technique is ready.


Share
Pin
Tweet
Send
Share
Send