Share
Pin
Tweet
Send
Share
Send
Household brush with wooden handle and bristles from ribbons of plastic bottles. I can’t say that the whole process is straightforward simple, but also not very complicated. So anyone who wants to can repeat it if desired. This is an ordinary brush that can be used to clean the workplace after work.
To make one thing I needed about seven plastic bottles.

The process of making a brush from plastic bottles
Cut off the neck of the bottles. Only a straight cylindrical part of the bottle is needed.

We cut bottles into tapes in any way. I use this with a homemade device.

Larger view. The main cutter is a clerical knife blade.

The width of the tape in the end is about two millimeters or a little thicker.

Sliced tapes from bottles, with fixed ends, so as not to mix.

Next, I will need two more homemade appliances. These are the rollers for tensioning the tape:

And the frame for winding the tape:

With these things, you need to make a tight winding.
Tension rollers are two wine corks twisted with screws to a bar.
In order not to hold and not to pull the tape with my hands, I use this device. Yes, and pull the tape with your hands, you know, it’s fraught, you can easily be cut off.
We clamp the rollers in a vise and pass the tape through them.

We are preparing a rotational frame for the frame.

Dress up the frame.

We start winding by fixing the first end of the tape.

We make winding with medium effort.


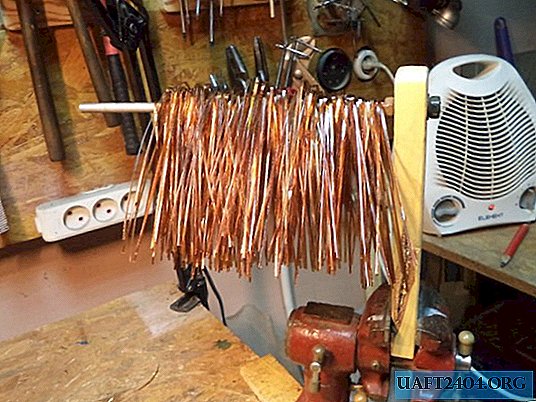
All bottles are wound.

If you now unwind this tape, it will again take the form of curls. To prevent this from happening and the tape remains in the shape of the frame, it is necessary to perform heat treatment for it.
There are several ways to do this:
- Submerge in boiling water.
- Blow hot air from the hair dryer.
- Heat in the oven.
I will use an electric heater for grilling. I put the winding there.

I spend thermostating for several minutes so as not to melt the tape. Everything should be in moderation.

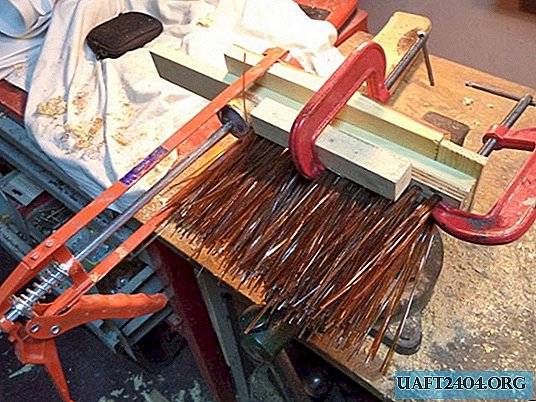
We take out and cut the entire winding exactly in the middle.

The segments retained their form of winding on the frame - which is what we need.

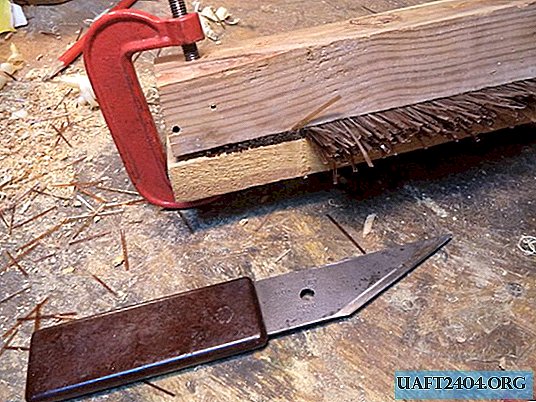
We collect all the segments.
Now prepare the frame for the brush. We take two cheeks of a suitable size.

We plan a bit for evenness.

We mark the holes in a checkerboard pattern for future bristles. Three rows in total.

We drill holes. First, a small diameter.

Then the big one. Bad experience. Where without him.

Let's try again:

Like this:


We make longitudinal cuts with a hacksaw.

With sandpaper we clean the groove.


To fix the bristles, I will use the usual culinary skewers.

We adjust the grooves, the fir-trees do not fit the skewers.

Cooking brushes.

Take the amount that is tightly inserted into the hole.

We pick up a row and poke a skewer.


We pull it all the way down, pre-lubricating it with glue on wood.


All three rows of brushes are ready.


Everything is oiled with glue.

Apply even more glue to the entire plane.

Now glue with a brush handle. Clamp in a vise and leave to dry.
The brush has taken on the usual shape.

Using round files or any other device:

We make smooth edges for a smooth transition.


Grind and make the entire surface smooth.

We drill a hole in the handle.

We fix the bristles between the two bars.

With a sharp knife, cut off the level.

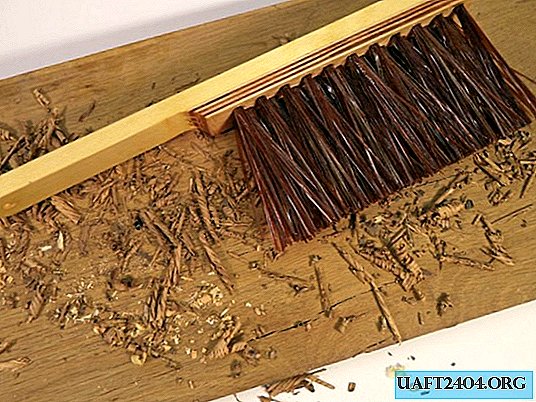
And now, a brush from plastic bottles is ready!

Finished brush and soaked in boiled linseed oil.


The brush at work perfectly copes with its duties.
Original article in English
Share
Pin
Tweet
Send
Share
Send