Share
Pin
Tweet
Send
Share
Send
Making a do-it-yourself rug with your own hands is quite simple. No special skills are required for this, only the needlewoman’s imagination and a sincere desire to create a unique thing for the development of her child are needed.
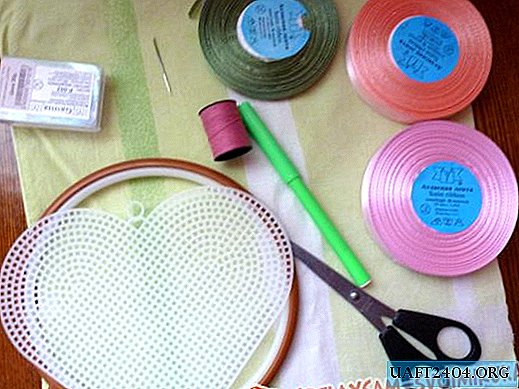
The materials and tools for the rug are also simple and affordable:
1. Cotton fabric, cut 2 times the size of the finished mat.
2. A synthetic winterizer of medium density, the size of a finished mat.
3. Beads, buttons, ribbons, braid of various kinds.
4. Felt multi-colored dense.
5. Adhesive tape.
6. Glue transparent "Crystal moment".
7. Plastic round packaging with convex parts (for example, from cottage cheese or scrapbooking products).
8. Threads, needles, scissors.
9. Sewing machine.
10. Pins.
11. A dense transparent film - a small piece.
12. Artificial flowers and berries of various kinds (knitted, soutache).
First of all, you need to sew the base of the rug.
To do this, the fabric must be folded in half in width with the front side inward, put a synthetic winterizer from the bottom. All layers should be chipped around the perimeter with pins. After that, you need to lay the machine line along the cuts of the mat at a distance of 7 mm from the edge, pull out the pins. In one place, the rug should not be sewn up - through this hole it must be turned to the front side. After eversion, the hole must be sewn up. The foundation is ready.
Now you can begin to create game elements for the development mat.

Before sewing the elements on the mat, they should be prepared and laid out on it so that the area of the product is evenly filled.
Large elements can be placed in the center of the mat, and smaller and about the same size along all sides.

One of the elements can be patch pockets. In some you can put soft knitted elements (in this case, owls and flowers), and in the other you can fix ribbons on which you can practice the ability to braid a pigtail.
Details of pockets can be made of felt. This material holds its shape perfectly, does not crumble, and retains its appearance for a long time. For greater attractiveness in the eyes of the child in the pockets, you can make “windows” by hemming squares of a dense transparent film.

Along one side of the rug, you can sew multi-colored felt squares, on each of which the child will need to complete a task. For example, you can count the number of brushes on a square, look inside the square, bending its corners, practice tying and untying a bow from a ribbon, and develop the skill of fastening and undoing loops and buttons.

Along the other side, you can arrange geometric shapes. Playing with them, the child will remember their appearance and name. Geometric shapes are also best made from hard felt.

In the center of the rug you can place a whole flower meadow - 3 large flowers and many small ones.
Large flowers can be made from transparent plastic packaging by sticking them as a core, and felt petals. In the "core" it is desirable to place something that will attract the attention of the child and cause his interest - beads, buttons.
Small flowers can be knitted and in the form of soutache products. It is advisable that they have a hole in the middle. Then you can sew beads on the mat, and plant flowers on these beads, thereby training your fingers.
In addition to flowers, berries can also grow in an improvised clearing. They can also be knitted, soutache, from buttons. In addition to berries, you can "pick up" mushrooms, small animals, insects, etc. The main thing is that the result is a very natural and harmonious clearing.

On geometric figures, the child will train not only his memory, but also develop the ability to stick and unfasten details. A special tape glued to the details will contribute to this.

In addition to any tasks, the elements of the mat can carry a simple but important goal - to enrich the child’s tactile experience. Various ribbons, ties, beads, lace, decorated around felt squares - all this can be felt, remembered, compared among themselves, which, undoubtedly, will appeal to the little researcher.
Particular attention should be paid to the development of such a necessary skill as lacing. A separate felt square with loops and a lace is what can come in handy in this matter.

A specially designed felt circle will help to train the ability to thread the tape through the loops. On it, with sufficiently long loops, you can practice the skill of threading the loop into the loop.
Another good way to develop motor skills is to move the buttons under the net. The child will need not only to learn how to feel the button, but also to exert enough effort to move it.
The listed items are far from all that can be done on the developing mat. There can be a huge number of options for such a product. The most important thing is that he fully meets the task set for him - in a playful way, simply, unobtrusively, entertainingly develop and please the child.
Share
Pin
Tweet
Send
Share
Send

