Share
Pin
Tweet
Send
Share
Send
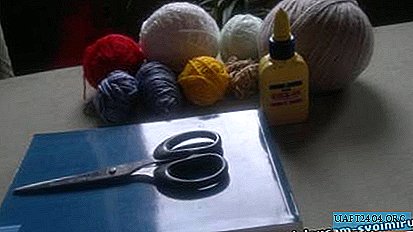
It is necessary to prepare such materials and tools as:
1. Cardboard blue A5 (15x21 cm);
2. Cardboard double-sided blue;
3. Design paper blue with white polka dots (can be used with any discreet pattern);
4. Decorative blue and white polka dot ribbon;
5. Rhinestones - 1 piece of blue;
6. Paper for quilling - white, black, yellow;
7. Figured puncher (preferably a flower);
8. Double-sided tape (it is better to take foam);
9. Scissors, glue, tweezers, quilling tools.
First, let's start the implementation of the most important element - the bee. To do this, take black and yellow quilling paper of 8-10 cm, glue the strips together.

We begin to shape the roll using the quilling tool. We do it as in the photo, so that a volumetric figure will result.


Carefully remove the part from the tool and fix it with glue so that the shape is not lost.


The second element is made of three pieces of paper for quilling - black, yellow and again use black. Each segment is approximately 8 cm long. The finished two volumetric elements should be connected to each other, forming the body of a bee. Cut 4 cm of black quilling paper and cut it lengthwise. We bend in half and use the quilling tool to twist the edges, forming the antennae of the bee. From white paper, we cut out two small circles with scissors that will serve as eyes.
Next, take a white quilling paper and make the bee wings.

We connect all the details of the bee with glue.

Now let's get down to the basics. We take a blue cardboard, bend it neatly in half.
From a blue double-sided cardboard, we cut a rectangle, the dimensions of which are 9x12.5 cm. We attach it to a double-sided foam tape to the base.


From the designer blue polka-dot paper, we cut out a figure measuring 5x11.5 cm, while trimming the corners. From the cropped corners with the help of a figured hole punch we make a tulip (or any other flower).

Take a decorative blue ribbon with polka dots.

We cut off 6-7 cm of ribbon and fasten it to a figure from designer paper. We glue the part on double-sided tape on the base of the postcard on top of a blue cardboard.

From the same ribbon we make a bow, decorating it in the center with a blue strass.

We fix the finished bow on a postcard.

Now attach the bee.

The original, fun postcard is ready!

At the back, you can attach a flower figure from a hole punch.

Share
Pin
Tweet
Send
Share
Send