Share
Pin
Tweet
Send
Share
Send
To work on the rose, we need the following materials:
- plastic suede of lemon and green color.
- dry pastel of orange and raspberry color.
- wet wipes.
- floristic thin wire.
- iron.
- scissors.
- glue gun.
- a toothpick.
- a big elastic for hair.
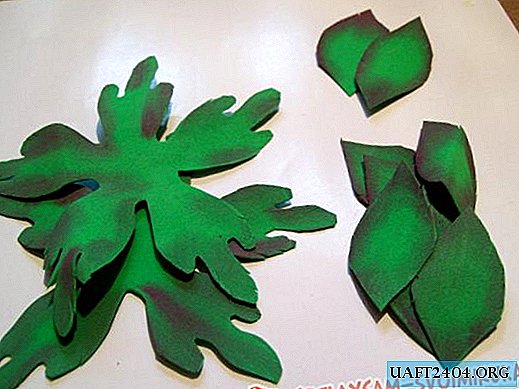
And now we’ll draw the gum templates. For the flower itself, you need 4 types of petals in the shape of a droplet. The smallest will be 4x4 cm in size, they need 12 pieces. The average petal is 4.5x4.5 cm in size, and they will need 10 pieces. Big petals will be tedious 7 pieces measuring 5.5x5.5 cm. And another huge 5 pieces measuring 6.5x6.5 cm. For a rose, you will still need a substrate of 2 pieces in diameter 11 cm. And additionally leaves of two sizes, 2 pieces in 5.5 x 3 cm wide and 8 pieces 4.5 x 2 cm.

According to these patterns, we cut out all the petals from the plastic lemon suede. We apply the template to the suede and circle with a toothpick, then we cut these blanks. From green foamiran we cut out blanks of leaves and a flower substrate.

When all the templates are ready, we begin to tint them. Take a dry pastel, first orange, then raspberry.

We put a wet napkin on the finger and we collect orange pastel on it, by grinding it with paint. Then we take the blanks of the petals all in turn and begin to paint them over a wide edge.

Orange edges will be on all the petals. We process them on both sides and allow to dry well.

Now we begin to paint over all the blanks with raspberry pastel. But in this case we tint only the edge, capturing the petals quite a bit.

We also process all the workpieces and always from two sides.

We continue to work with blanks. We take a substrate of green color. And with scissors we make notches around the edges.

We also cut notches on the leaves.

When all the leaves are processed, proceed to their staining. We also take a raspberry-colored napkin and pastel. We pass all the green blanks with a napkin with paint along the edge on both sides. Let them dry.
We continue to work on the petals. They need to be given a new shape. We will use the heat of the iron included in the 2nd position or wool. We start again with the smallest blanks. We apply alternately to the iron. Then we quickly fold it into an accordion.
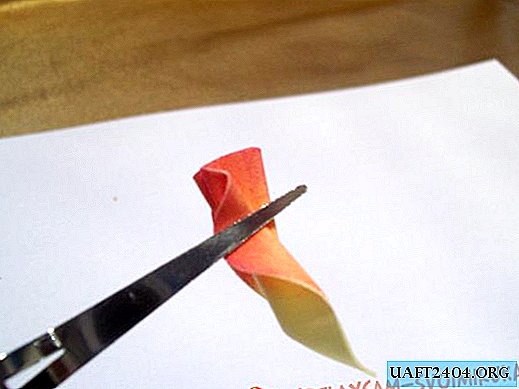
Fingerly scroll the upper edge of the petal. Then straighten and fingers stretch the petal in the middle, making a recess, like a boat.

Thus, we process small petals. And all other flower blanks will be with a stronger depression, and plus the upper edges, we will also bend the fingers in the direction from the middle. We will get even deeper boat with curved edges.

And thus, we process all the other rose petals.

When everything is ready for the rose, we proceed to give the substrate a new shape. We have 2 of them. We warm it on the iron and quickly fold it, then scroll it with our fingers.

We process both sepals.

It is time for the green leaves. You will need a plastic sheet from old flowers, veins are clearly visible in it. We take a blank of the sheet, heat it on the iron and quickly put the bulk sheet on the layer, press it well with the fingers along the veins so that they print on the suede sheet. So, we process all the leaves.

When the leaves are ready, we begin to apply floristic green wire to them from the wrong side. Cut a piece of 7 cm long and fix on each leaf blank.

Then we connect 3 leaves in a bundle, the top will be slightly higher than the others, and twist 3 wires together 1 cm from the last sheet.

And it remains to close the twisted wire with a special flower ribbon or corrugated paper.

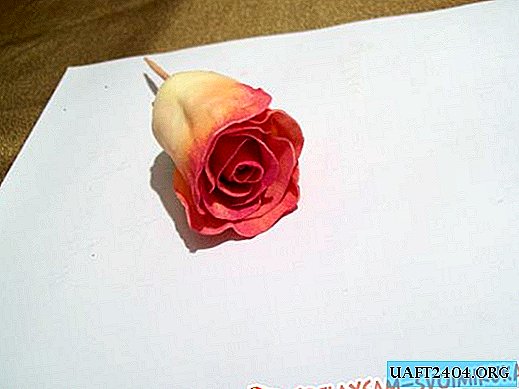
It is time for a rose. We take a piece of foil measuring 11x11 cm and a toothpick.

First we twist the foil into a ball, then we form a droplet 3 cm high and 2 cm wide. We glue the toothpick in the middle with a glue gun.

We start with small petals, there will be 12 of them. The first is glued completely to the foil, folding the upper edge tightly into a tube.

On it from the opposite side we glue another petal also tightly folding.

Glue the next two petals, applying glue in the middle of the petal and above the middle at the edges.
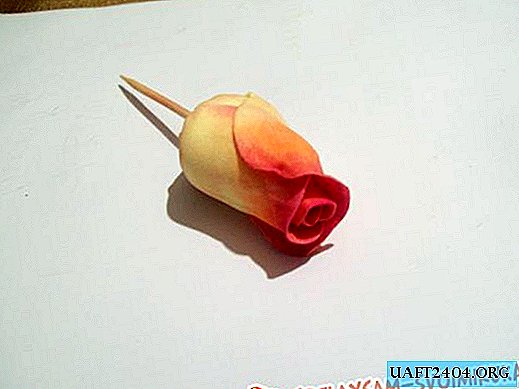
We try to glue all the small petals denser to each other, moving in a spiral.
We proceed to the medium-sized petals, of which 10 pieces. We also glue them in a spiral, but we already make the rose open. To do this, apply glue in the petals to the very bottom and to the side to the middle of the petal.


Now glue large petals of only 7 pieces. But they will stick only to the bottom of the workpiece.


The queue came to the huge petals, we have only 5 of them. Turn the rose upside down and glue the petals, overlapping them with a whip on each other, that is, each new petal begins from the middle of the previous one. We glue these petals only on the very bottom edge, which is the toothpick.


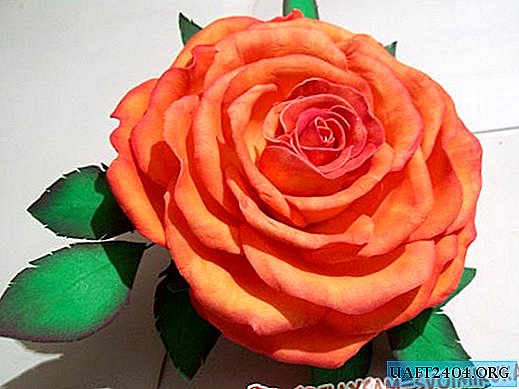
The rose turns out magnificent due to the correct application of the petals. In diameter, it turns out 11 cm.

The rose is ready, but you should trim the toothpick and glue the finished flower substrates in its place. We fix them in a checkerboard pattern.

Now glue 3 branches with leaves.

We apply glue for fixing and immediately insert a rubber band for hair into it.

Take a little green tape to close the adhesive joints. We also fix it with a glue gun.

OK it's all over Now. Our gum for hair "Veronica" is ready.

Good luck to all.
Share
Pin
Tweet
Send
Share
Send