Share
Pin
Tweet
Send
Share
Send
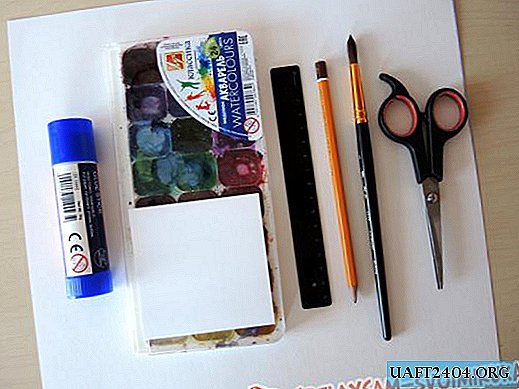
1. Cardboard - white, glossy,
2. Awl, large needle or compass,
3. Thread floss,
4. Ordinary sewing needle, small size,
5. Scissors,
6. Pencil.
A few tips:
1. If there is no floss of suitable color, you can take ordinary sewing threads of similar density.
2. When embroidering in the "Ison" technique, always select pictures in which there are no very small details.
3. When marking up on one closed object (ear - triangle), try to put an even number of points.
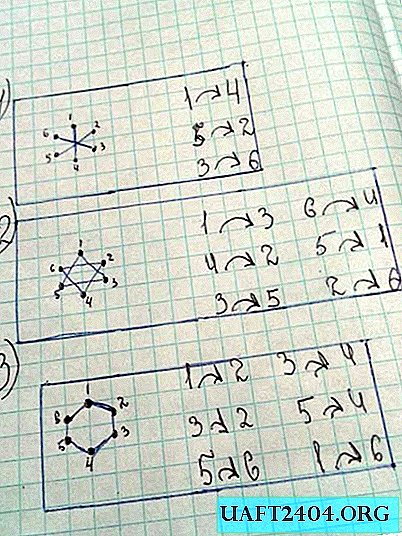
4. Scheme of the contour, middle, serial line.
First, select a picture.

We print it.

Take cardboard.

We attach a picture to it, so that there would remain fields of 5-8cm. We put points on the office with a distance of 2-3mm.

Separate the bows. We take our tool for piercing, I have a compass, and pierce along the contour, which was previously marked with dots.

It should work like this.

Now put the dots on the bows

And eyes, pupils, noses.
We puncture everything except bows. Also pierce a big heart.

Now put the dots everywhere.

And pierce. Unpin the picture. You should get something like this. Choose colors. The color of the eye (middle), and the bow should be different.

We begin to embroider:
We start embroidery from the middle of the eye - a shade of pink. We fasten the thread on the back.

We go out through the hole of the top.

We enter the seventh hole from the exit. It should work like this.

We leave on the left, and enter the next of which we left for the first time, clockwise. It will turn out like this.

Then we exit on the right, and enter the lower, left, corner hole. This is how it should turn out from behind.

And so on the front.


We also begin to embroider the second ear. Do not forget to fix the threads with tape. In the same way we embroider all the ears.


Now we embroider bows. In the same way as for the eyelet, we take the thread and fasten it with adhesive tape at the back. First we embroider the "middle".


Now embroider the front side of the bow.


Sheathed contour. We also embroider the second bow. Embroider the eye. First through the middle, and after the contour. Also embroider the remaining 3 eyes. Now embroider the nose: first through the middle, and after the outline. Let's get down to the little heart. Now we will embroider the outline of the cats. Charge the needle. We embroider the contour.


Next, we proceed to the pupils. They need to be embroidered in 3 "accounts": middle, contour, and serial line - use the scheme. Gently flush the pupils so as not to flash the white threads.


A large pupil will be slightly different from a small one. This is how all 4 eyes should turn out. Now let's start embroidering the last one, and the main element is a big heart. We embroider with a contour, but instead of one hole, we skip two, and enter the third.

It will turn out like this.


Share
Pin
Tweet
Send
Share
Send