Share
Pin
Tweet
Send
Share
Send
I must say that the wirework has been living among people for quite some time - many jewelry is created using this technique. They especially liked to twist jewelry masterpieces from the wire in the Middle Ages - it was believed that the thinner the wire the master could work with, the more skilled he was. So, the work of such a master was valued more.
Currently, the torsion technique of wire is included in the subsection of the main popular types of needlework or what we are used to know as “hand-made”. The main materials that will be popular here are copper, wire from special silver alloys, steel, aluminum and semi-jewelry wire from a copper core coated with a layer of silver. The main tools here are wire cutters, metal cutting scissors, pliers, pliers, platypuses (a special type of pliers with 180 degree tips beveled). As well as jewelry tools: crossbars, rollers, jewelry mallets and more.
I must say that this technique is not at all simple, as it may seem at first. Wywork requires strong hands, clear movements and a keen eye from his adept (we will call him that). It may take about six months, until the beginner’s hands remember all the necessary movements and twist things in the slightest degree.
Initially, it is recommended to try to start working with aluminum and steel wires. Thanks to its low-cost pains, it will not be a pity to spend them on first ventures and not be afraid to make a mistake and spoil the wire. For more professional projects, they, unfortunately, are not very suitable: aluminum wires are soft and a thing from them can not withstand its own weight, and steel, on the contrary, is too hard and your hands can quickly get tired.
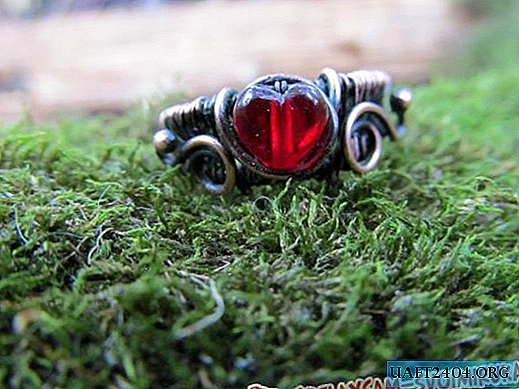
The best option is all kinds of copper wire. You can get it both in radio electronics and wires, and in stores for needlework. Copper is obedient and soft in the hands, but at the same time strong and strong - it will give life to durable products. The only "but" - copper must be able to handle. Therefore, in parallel with the study of torsion techniques, you need to get acquainted with the patination of a copper product and its subsequent varnishing. This lesson will look at making a ring just out of copper wires ... So, let's get started.
To create a copper ring we need:

Copper wire in two sizes: 1.0 for the frame, 0.03 for the winding.
Round pliers and wire cutters.
Crossbar for winding the base of the ring (we have a usual felt-tip pen).
Beads for the core of the ring.
To get started, take the wire.

We will use three types. Thicker is the basis of the ring. Fine we braid the base and attach the bead.

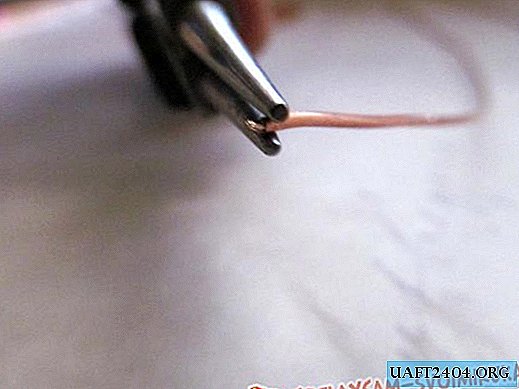
And the third, which has droplets at the ends, we will decorate the finished ring. The droplets on the rings were made using a gas burner. This requires some skill, so this is not recommended for beginners - you can get burned and get burns.
From a piece with a thick wire, cut a piece

Take our pliers

Clamp the end of the wire between the jaws of the tool
And turning the tool away from us, we form a loop at the end

We form loops on both ends of the wire so that the ends of the ring do not scratch your fingers

Then we take our makeshift crossbar and, pressing the wire with our finger, wind the wire onto the crossbar-felt-tip pen by its lower end. We need to make two full turns.


As a result, we should get the following:


Then, remove the workpiece from the crossbar, take a thin wire and make about 5-6 turns at the base of the loops at the end.

Then we take the end of the lead (the one with which we wrap the base) of the wire and dive under the upper wire of the base.

Tighten the loop.

Then we wrap the top “crossbar” of the base with the leading wire and make a dive already in the opposite direction (under the lower “crossbar”). Also, then tighten the loop.

And with such "dives" we braid the entire base of the ring. It is important to do the whole winding under tension, then the braid pattern will lie flat.
Here is the result, as they say "half".

In the end we get such a foundation.


Then we take our beads and string one of them on a new piece of thin wire.


We find the middle of the ring and between the turns of the braid we enter the two ends of the wire with a bead. Pulling the wire, we fix the bead, winding both ends to the upper and lower crossbars, and then we pass them several times through the bead and we wind it, Then we cut off the excess ends.

Then we take a wire with droplets, Wrap it around a bead.

Then we wrap the base of the ring with two ends and bring them out. Beautifully bend.

It turns out this kind of blank.

Then the ring is placed in ammonia vapors (ordinary ammonia) and polished. Here is the result.

Share
Pin
Tweet
Send
Share
Send